TekXPress series specific notes (Under construction)

PrevUp
Most of the notes below are pertinent to all XP models, XP4xx, XP3xx and XP2xx, respectively.

Pixx

XP4xx

xp417c.front xp417c.inside xp417c.rear

XP3xx

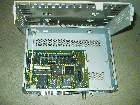
xp35x.front xp35x.inside xp35x.rear

XP2xx

xp221ch.front xp221ch.inside xp221ch.rear

XP2xx monochrome

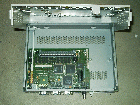
xp214m.inside

XP2xx PSU

SW201 PSU SW201 5V DC/4A; 12V DC/1A. Alternative: IBM 87G4523

Configuration

Configuration of a new TekXPress terminal requires the following steps. (The naming convention @GSI is: xwt???).
  1. Ensure the bootserver ( @GSI currently biops5z ) is alive, the NCBridge software is installed and the configuration file(s) exists.
  2. On the bootserver, in /etc/bootptab enter the new device's name, hardware address (ha), IP number (ip), e.g.:
    xwthu.gsi.de:tc=xp350:ha=080011xxyyzz:ip=140.181.nn.mmm
    
    The tc entry refers to a generic template for this type of terminal, it should be defined as part of NCBridge installation.
  3. Power on the terminal, press space bar to get into the Boot Monitor. The current settings are displayed in the top area of the screen.
    To configure for TFTP/BOOTP boot use console commands, e.g.:
    IADDR 192.168.1.55                 # the terminal's IP address
    IGATE 192.168.1.1                  # the domain's gateway
    IHOST 0.0.0.0                      # should look for boot host
    BMETHOD tftp                       # set the boot method
    BPATH /tftpboot/tekxp/boot/os.350  # boot path on the boot host, if different
    BAFrom NVRAM                       # important if no name services available
    NVsave                             # remember 
    
  4. If necessary, define the type of connected keyboard:
    KeyID                              # keyboard selection menu
    
    then, as indicated, use space bar to select keyboard type and language, and the Return key to acknowledge. An additional Return will cause the NVRam to be updated and gets you back to the monitor
  5. type
    Boot
    
    to boot the terminal. If all goes well, the X server code will be loaded from the boot host and finally a login menu appears.
    During the boot process, it may well happen that the Flash ROM is updated automatically, e.g. with the latest boot monitor version, if such software is found on the boot host. Do not interrupt this update !

Notes

Setup Menu

Use Shift-Pause to get into the Setup Menu.

RAM

The XP35x has four PS/2 memory slots which can hold up to 64MB in total. Plus 4MB non-removable RAM.

PSU

The internal PSUs of the XP3xx and XP4xx are very similar, if not identical.
The voltages are:
black :   0V
yellow:  +5V
red   : +12V
blue  : -12V

Trouble Shooting


Last updated: 13-Apr-2013, M.Kraemer

Impressum Data privacy protection